


Brace for impact: every 1° of pelvic tilt begins at the core.
Discover the biomechanics that fuel the greatest swings in history, and master them yourself.
© 2025 Neil Alvarez. Tilt Golf: Core Ignition Doctrine. All rights reserved. COBISS.SI-ID: 256328707 ISBN: 978 961 07 2997 6
This publication was authored and self published by Neil under the Hyperstryk imprint. Tilt Golf: Core Ignition Doctrine (Preview Edition) was released in digital HTML format in November 2025 and is available online through paid access. The book presents a highly specific, fundamentals based visual guide to tilt driven core activation in golf. It synthesizes established biomechanical research and coaching principles into a structured walkthrough designed to help readers understand and apply these concepts in practice. Upon entry, readers are guided through an interactive preview walkthrough that introduces the core ideas and navigational flow of the digital experience. Visual design and instructional sequencing were developed independently by the author to support clarity and precision. The publication is registered under DOI https://doi.org/10.5281/zenodo.17542223 and is intended for commercial distribution. All rights reserved.
The Evolution of Core Ignition
Golf is one of the most precise mirrors of human movement. Every swing reveals how the body organizes itself under pressure, how it tilts, compresses, rotates, and either holds or collapses. Neil Alvarez, a performance trainer with over two decades of experience in physical therapy and sports biomechanics, has studied these patterns not only to improve performance but also to uncover the deeper logic behind motion. This book is written for two audiences: the golfer who wants to train with clarity, and the coach who wants to teach with precision.
The story begins not on driving ranges but in rehab rooms of the 1970s, where physical therapists used posterior pelvic tilt to reduce pain and stabilize the spine. By the 1990s, biomechanics labs revealed something more: tilt did not just protect the spine, it loaded the core. Athletes in sprinting, gymnastics, and martial arts harnessed it to generate explosive movement. Golf, however, lagged behind. For decades, players swung from their hips instead of their pelvis. Rotation was taught, but ignition was overlooked.
Between 2022 and 2025, everything changed. Coaches began to notice that players who fired from their pelvis gained more control, more rotation, and better strike feel. Posterior tilt emerged as the ignition point for elite ball striking. Yet no one could measure it live, and no one could help players truly feel it until Neil Alvarez did. With his background in physical therapy and sport specific movement, he became the first to capture the exact angle of posterior pelvic tilt inside a live device. Hyperstryk was born: a system that guides the tilt, locks the spine, loads the core, and lets golfers experience ignition in real time.
This book builds on that breakthrough. It moves beyond swing theory to study motion in detail, expose the sequences that drive performance, and elevate how athletes and coaches train. The body does not move randomly; it moves in patterns. Each pattern has a leader, a bone that initiates, and a team of muscles that respond. Together, he unveils these sequences, dissects them, isolates them, and demonstrates them step by step. Readers will compare the feel, identify the muscles that activate in each phase of the swing, and learn how to coach them with confidence.
Golfers and coaches do not need to memorize Latin terms or overwhelm the mind with anatomy. Transformation happens when complexity is translated into action. That is why he created simple, teachable cues using practical language that resonates and delivers results. One of his favorites is: “Never let go of your core. Point that tailbone to the front.” It is not just a phrase, it becomes a command. When golfers hear it, they brace, their structure locks into place, and from that brace they discover unstoppable power.
This work is for the athlete who wants to feel what is happening beneath the surface, and for the coach who sees the spine before the swing. Every chapter becomes a blueprint of torque. Every page is authored to protect the spine, evolve the athlete, and build a legacy of biomechanical precision. Along the way, he teaches readers to truly see through the swing, to use their eyes to hyperfocus on specific mechanics in motion. The logic is simple, the sequences are clear, and anyone can understand them once revealed.
Before stepping into the legends, readers must first step into the ground beneath them. Core principles are the language of every great swing. Without them, the cues of Nicklaus, the torque of Tiger, the rhythm of Rory, and the precision of Hogan remain foreign. With them, every sequence becomes teachable, every phase becomes usable, and every swing becomes yours to command. The artistry of Seve, the discipline of Faldo, the power of Daly, the consistency of Els, the creativity of Mickelson, and the modern dominance of McIlroy and Koepka all prove that mastery is never an accident, it is always a progression.
We begin by establishing clarity. The opening chapters provide the structure to feel the spine, brace the core, and understand the ignition that drives motion. Only then will the trademarks of the greats make sense. The stance, the transition, and the finishing balance will hint at their deeper principles. Readers will see enough to recognize their mastery, and when ready, the complete breakdowns, all three phases and all the ignition patterns, will be waiting.
This book is knowledge in performance. Core truths form the foundation, and mastery awaits when golfers and coaches step fully inside.
Table of Contents
Chapter 1: The Origin of Core Ignition
This book is built on years of compiled research studies, clinical observations, and biomechanical investigations from around the world, including strength and power training protocols used by elite athletes. We break these studies down, compare them, identify their patterns, and translate them into pure demonstration and feel. Every insight has been tested, refined, and applied across all phases of the golf swing. Many thanks to the clinicians, researchers, and performance coaches whose work continues to shape this field. Tilt Golf brings these findings together with one goal in mind: to restore command.
Core ignition begins when your body responds to its true commander, the deep core. Activated through pelvic tilt, this commander sets the sequence: the right muscles, the right order, the right feel. That is when your swing becomes powerful, fluid, and controlled. But when the commander is missing or misfiring, the system breaks down. Compensations take over, injuries creep in, and performance becomes unpredictable. The problem is not poor technique. It is a missing command source.
🔗 Research: golfers with poor pelvic tilt control show reduced clubhead speed and higher injury risk. Anterior Pelvic Tilt in Golfers: International Journal of Exercise Science
Conclusion: Researchers found that inadequate pelvic tilt control reduces swing speed and increases injury risk.
Tilt Golf reveals what is really happening beneath the surface. It is not just about hips, shoulders, or coaching cues. It is about the internal systems that quietly govern movement. When those systems fall out of sync, even good mechanics can collapse. Tilt Golf helps you see those forces, understand their role, and train them to support your swing.
🔗 Rotational sequencing of the pelvis and trunk is critical for speed and consistency. Rotational Kinematics of the Pelvis: International Journal of Golf Science
Conclusion: Researchers concluded that proper pelvis and trunk sequencing is essential for consistent swing speed.
Tilt Golf is built on understanding and real feel. It explores the deeper problems behind golf performance, the ones that quietly shape how your body moves. These problems often show up as movements that feel off, awkward, unstable, or hard to control. But they are not accidents. They come from a broken chain of command. When the true commander does not show up, the other muscles try to take charge. Each one acts like a commander, but none are aligned. The system becomes confused, flawed, and unpredictable. The solution is not to fix every part. It is to train the commander. Tilt Golf shows you how to do that, step by step, so your swing becomes stable, powerful, and truly yours.
🔗 Poor sequencing and lower extremity strength deficits are linked to back pain in golfers. Pelvis and Trunk Sequencing: Annals of Sports Medicine and Research
Conclusion: Researchers found that weak lower body strength and poor sequencing contribute to back pain in golfers.
Imagine operating a massive swinging ball designed to break a wall, but it keeps missing the target. You adjust the arms, the ropes, the wheels, and it only gets worse. That is what happens when you try to fix the body without addressing the source. You do not need a new controller. You need to train the one already inside.
🔗 The transverse abdominis (TVA) acts as a “natural corset” of the spine, essential for stability and injury prevention. Aiello Family Chiropractic: TVA Activation · American Sport and Fitness Association: TVA & Core Stability
Conclusion: Researchers concluded that TVA activation stabilizes the spine and prevents injuries during golf swings.
But inside every movement, there is another commander you did not choose. He is reactive, untrusting, and quick to take over when the deep core goes quiet. We know his patterns. He does not support your swing. He hijacks it. He brings confusion, instability, and breakdown. And he is always waiting.
🔗 Reviews confirm the modern golf swing places significant stress on the lumbar spine; low back pain is common among golfers. The Biomechanics of the Modern Golf Swing: Sports Medicine · Lumbar Spine and Low Back Pain in Golf: The Spine Journal
Conclusion: Researchers found that the modern golf swing stresses the lumbar spine, leading to frequent low back pain.
Later chapters will show you how simple the application really is, and it will surprise you how easy it feels, even though it is not always obvious at first.
1.1 Why Study Posture Before the Swing

Posture is the silent architect of the golf swing. Before the club moves, before the hips rotate, before the wrists hinge, posture decides what is possible. Studying posture means studying the body’s ability to organize itself for motion, force, and recovery. It is not just about standing tall: it is about how the joints align, how the muscles stabilize, and how the body prepares to rotate without collapsing.
In golf, posture shows up everywhere. At setup, it defines the spine angle, pelvic tilt, and shoulder alignment, creating the blueprint for swing path. During the backswing, it determines how much rotation the torso can generate while preserving balance. At impact, posture controls how force is delivered: the body either stays stacked or folds under pressure. After the follow through, posture reveals how well the body absorbs and recovers from rotational stress.
How Posture Looks in Golf
Proper posture balances strength and readiness. The spine tilts forward from the hips, not the waist, creating a long and neutral back. The chest feels open but not puffed, shoulders rest naturally, and arms hang freely under the body. Knees bend slightly, giving the stance athletic readiness without tension.
From the side view, the beltline angles gently, the pelvis stays neutral, and the spine maintains its curve without exaggeration. The head aligns with the spine instead of jutting forward. From the front, posture looks symmetrical: shoulders level, weight balanced evenly across both feet, and the core engaged to prevent collapse.
In motion, posture reveals itself at every phase. At setup, it defines spine angle and pelvic tilt. During the backswing, it shows whether the torso can rotate without losing balance. At impact, posture decides if force is delivered cleanly or if the body folds under pressure. In the follow through, posture demonstrates recovery: a tall finish, balanced feet, and a spine that extends with control.
1.2 The Pelvis: The Bone That Commands the Game and Builds Champions

This bone does not just tilt. It commands. It does not just brace. It activates. It does not just survive the swing. It makes you perform. When it tilts backward, it does not perform for the mirror. It prepares for impact, locks the brace, protects the spine, and holds the fire.
When this bone locks into compression, the body responds like a team trained for impact. The core compresses inward with no leaks, the glutes anchor the pelvis with no drift, the ribs wrap the vault with no flare, the breath drops low with no panic, the spine rotates clean with no fold, the elbow connects to the core with no float, and the feet drive through the triangle with no collapse. These are not just muscles. They are loyal forces. They follow the bone when it chooses structure. They hold the brace when the bone stays tucked.
This bone is not just a shape. It is a decision maker, a commander, a vault that holds the fire and the team that follows.
Together, we uncover the mystery of this bone, the armies that follow it, and the way we command it intelligently and automatically until we reach impact on the range.
Ask yourself: which bone makes your body respond like a team? Which bone keeps your structure zipped through chaos? Which bone turns your motion into meaning? This bone does not just move. It makes you perform. It makes champions out of motion.
1.3 The Darkside of The Bone That Destroys the Game

This bone does not just tilt. It collapses. It does not just brace. It locks tension. It does not just survive the swing. It sabotages it. When it tilts backward without control, it misaligns the brace, exposes the spine, and leaks the fire.
When this bone locks into dysfunction, the body responds like a team caught off guard. The core leaks outward, glutes lose stability, ribs flare wide, breath rises high, the spine extends early, rotation stalls, elbows float, and feet collapse inward. These are not just muscles failing. They are confused responders scattering when the bone loses structure. The vault unlocks, and the brace abandons its duty.
This bone is not just a shape. It is a saboteur, a misleader, a vault that leaks fire and fractures the team that follows.
Together, we expose the dysfunction hidden in this bone, the breakdown it triggers across the system, and the way it hijacks motion without warning. Only then can we reclaim impact through structure.
Ask yourself: which bone makes your body scatter under pressure? Which bone unzips your structure mid swing? Which bone turns your motion into misfire? This bone does not just move. It breaks the game. It turns motion into collapse.
1.4 Why and When the Vault Leaks

If the bone can hold the fire, it can also hold the leak. This is the shadow side of tilt: the betrayal of structure. The same bowl that locks the brace can also flip forward and unleash chaos. In golf, this bone does not act alone. It commands armies. When it tilts the wrong way, it sends the wrong troops.
One muscle in particular lives at the front. It is not your ally. It pulls the bowl forward, arches the back, and whispers lies to your posture: “Stand taller. Stick your chest out. Look athletic.” But it is a trap. When this muscle wins, the tailbone flips, the belly pops, the ribs flare, the spine folds, and the brace dies.
It is not just a muscle. It is a leak in the vault: the villain inside the bowl. When the bone tilts forward, it does not simply move. It deploys a collapse pattern, a chaos army. The belly pushes outward, the pelvis thrusts, ribs flare and float, the spine arches and disconnects, the brace collapses, rotation leaks, and impact compensates. These are not random faults. They are loyal followers of the leak. The bone tilts, and the body obeys.
You do not just train the tilt. You tame the bone. You teach it to choose fire, not the leak. You teach it to protect the spine, not perform for the mirror. The bone does not care about appearances. It only cares about what holds under pressure.
Beneath the core lives a saboteur. It summons the spine muscles as its cohorts. These muscles train themselves in all postures, even at rest. They are stronger because they are intertwined directly on the bones of the spine. They oppose the body’s forward fall. They stand tall. They dominate when they sense the core and its allies are not united. They take over instantly when the core fails.
That is when you lose stability, power, accuracy, control, precision, and the ability to play with skill. Most of all, it causes injury and fear. You lose your intelligent and beast mode performance.
1.5 Refreshing the Mind of a Golfer

Golf is often spoken of as a game of inches, yet its true measure lies in angles. A slight tilt of the pelvis can ripple through the body, shifting force, shaping the spine, and transforming the feel of a shot. Posterior pelvic tilt becomes the spark, a quiet ignition that unites the body in motion.
Tilt Is the Gateway
Tilt breathes life into the swing. It is a pulse that unlocks rotation and stability. Muscles respond to its rhythm, translating the signal into movement that feels natural, a swing that flows instead of fights.
The Phases of the Swing
Each phase unfolds like a conversation. Setup prepares the pelvis. The backswing holds the line. Transition carries suspense. The downswing erupts as the glutes drive extension. Impact braces against torque, and follow through releases, lifting the body tall again. The swing becomes dialogue, muscles speaking and motion replying.
Power at the Edge of Injury
Golf lives at the edge of stillness and violence. Feet grip the ground, hips bind to geometry, the spine twists under load, and the club accelerates with force. This paradox makes the game thrilling, a balance of brilliance and collapse.
The Core and Its Cohorts
Survival on that edge calls for allies. The TVA sparks ignition, obliques steer rotation, multifidus guards the spine, pelvic floor presses upward, diaphragm ties breath to structure, glutes anchor the chain, and hamstrings hold tension. Together they form a coalition, a neuromuscular alliance that commands the swing.
Tilt and Muscle Evolution
Tilt is choreography. Core and kinetic muscles move in unison, joined by others that add stability and power. The sequence adapts to every club, revealing a shared foundation from driver to wedge. Stability, rotation, accuracy, and distance emerge as natural outcomes of ignition. And when the game turns against you, core ignition anchors the swing, reminding the body of its path.
The questions golfers have carried for decades, and the answers hidden in golf kinetics, converge here. Applied with clarity, the swing becomes more than powerful. It becomes intelligent, adaptable, and unshakable under pressure.

Chapter 2: Tilt Anatomy in Motion
The image shows how pelvic tilt reshapes posture and rotation. Your hips govern balance, tempo, and swing identity. In this chapter, we explore two key pelvic patterns: posterior pelvic tilt (PPT), a small tuck of the hips that flattens the lower back and tightens the core, and anterior pelvic tilt (APT), a forward tip that opens the front side and lifts the chest. Each tilt supports a different phase of the swing: setup, rotation, and finish. Tilt is more than posture, it is your swing’s ignition system. Once you feel how each pattern works, your motion becomes smoother, stronger, and easier to repeat. Research confirms pelvic tilt is a critical movement pattern influencing balance, rotation, and injury risk (TPI: Understanding Pelvic Tilt in the Golf Swing).
2.1 How the core works with tilt for stability and power
Posterior pelvic tilt tucks the hips under, flattens the lower back, and draws the core inward. When timed correctly, it locks the spine and channels power through the hips. Clinical guidance confirms that posterior pelvic tilt exercises flatten the lumbar spine and protect against back pain (Verywell Health: Pelvic Tilt Exercise).
Golfers who rely heavily on PPT often appear strong and braced: the lower back flat, tailbone tucked, ribs pulled down, glutes clenched. In the swing, this posture can make them look tight or stuck: backswing shortens, hip turn is limited, upper body overworks, and downswing loses flow. Follow through cuts off early. They look powerful, but bracing comes too soon. Posterior tilt stabilizes the spine and channels power when timed correctly, while excessive anterior tilt or premature bracing disrupts rotation and raises injury risk (JT Fitness & Golf: Pelvic Tilt and Swing Performance).
Think of the pelvis like a bowl: when it tilts backward, the tailbone tucks, the lower abs draw in, the back flattens, and the glutes and hamstrings anchor. The ribcage stacks over the hips, creating a stable base that protects the spine and transfers force. When the core pulls in and the glutes press down, rotation becomes clean, the spine stays protected, and the swing flows. Excessive anterior tilt disrupts the kinetic chain and increases lumbar spine injury risk (International Journal of Exercise Science: Anterior Pelvic Tilt in Golfers).
But if the bowl locks too early or stays tight too long, rhythm fades, sequencing breaks, and the chain of power falls apart. Tilt is not a static shape, it is a rhythm. It must arrive at the right moment, live just long enough to stabilize, and then release so the swing can breathe again. When tilt is treated as motion rather than posture, the body finds its natural flow, and the swing becomes both powerful and effortless.
Posterior Tilt in the Swing
Setup is where the story begins. Tailbone tucked, core pulled inward, spine steady. The body feels braced, not rigid, ready to move. Glutes and hamstrings pull the hips back, abs lift the pelvis, the spine flattens. Cue it simply: point your tailbone forward, tighten your core inward.
Transition is where tilt holds its ground. The brace deepens, rotation unfolds from the middle, spine aligned. Core stays tight, glutes grounded, side abs guide the twist. Cue it: tighten your core inward and let rotation unfold.
Release is where tilt lets power flow. Legs push through the ground, core stays tight, finish balanced. Glutes drive, abs hold, torso rotates with force. Cue it: brace through the hit, keep your core inward.
Quick Recap
The Mechanics Behind Posterior Tilt
Here is what happens beneath the surface when PPT activates under pressure. The pelvis tilts backward, the lower back flattens to protect the spine, glutes and hamstrings anchor the hips, the deep core pulls inward to stabilize, and the ribcage stacks over the hips to support breath and rotation. These actions happen together, triggered by pressure and timed by movement. Use mirrors, video, or feel to confirm them. These markers are key for clean rotation and spinal protection.
Coaching Posterior Tilt
To coach PPT, watch from the lead side to check pelvic timing and spinal length. Use rear view to confirm glute activation. Use front view to monitor rib control and core engagement. Cue PPT during transition and impact only. Release the tilt after impact to restore flow. Use breath to reduce over bracing: inhale into the ribs, exhale through the floor.
Timing is everything. When PPT fires on time, the spine stays protected and the swing stays clean. When it locks too early or holds too long, rotation stalls and power leaks. The tilt is not a posture to hold, it is a rhythm to time. Treat it as ignition, not as a pose, and the swing will carry both stability and freedom.
Posterior Pelvic Tilt: The Hidden Engine

Posterior pelvic tilt (PPT) happens when the core pulls inward and the glutes drive together. Think of it as a hidden engine that switches on under pressure. When it fires at the right moment, it braces the spine, anchors the pelvis, and sends rotational force up from the ground. Look closely at the image: the pelvis is tucked, the spine is steady, and the glutes are pressing down. This is exactly what you need to see. It is the physical proof that PPT is active. The key is timing. Fire it during transition and impact, then let it go. Hold it too long and the swing stiffens, energy drains, and motion stalls.
What You Should See
From the side, the pelvis tucks under as the lead hip clears. From behind, the glutes press down to stabilize. From the front, the ribs stay quiet and the spine stays long. From above, rotation speeds up without the torso collapsing. At ground level, the feet stay planted, absorbing and transferring force. The image shows this posture clearly. It is the model of how PPT should look when it is working.
What You Should Do
To coach PPT, stand at 90 degrees to the lead side and watch for the pelvic tuck and spinal length. Use the rear view to confirm glute activation. From the front, check rib control and core compression. Train PPT as a phase, not a permanent posture. Cue it only during transition and impact. Resistance bands help teach glute drive and pelvic tuck under load. Pair breathing with movement. Exhale during the tuck to reinforce core compression. Record swings and mark the moment PPT appears, adjusting if it shows up too early or too late. Finally, teach players to release the tilt after impact so the follow through stays fluid.
Why PPT Is the Hidden Engine
PPT is not the destination, it is the ignition. Anterior tilt may look tall, lateral tilt may shift balance, but posterior tilt is the one that anchors the swing. It signals core strength, braces the spine, and lets rotation explode without collapse. When trained as a timed response, it becomes the hidden engine that stabilizes the body, drives rotation, and protects against overload. The lesson is simple: feel it, fire it, release it. That rhythm is what makes a swing reliable under pressure.
Instructional Guide: How to Use Posterior Pelvic Tilt (PPT)
Posterior pelvic tilt is more than a posture. It is a skill that protects the spine and unlocks rotation. This guide explains how to understand it, coach it, and apply it in real swings. Each step builds on the last, helping you see what PPT looks like, feel how it works, and use it with confidence.
Step 1: Understand the Mechanics
Posterior pelvic tilt is the foundation of spinal protection and rotational clarity. When PPT activates, several things happen at once:
- The pelvis tilts backward to set alignment
- The lower back flattens to support the spine
- Glutes and hamstrings anchor the hips for stability
- The deep core pulls inward to brace the system
- The ribcage stacks over the hips to guide breath and rotation
These actions work together, triggered by pressure and timed by movement. Use mirrors, video, or simple body awareness to confirm them. They are the markers of clean rotation and safe sequencing.
Step 2: Coach with Precision
Checklist for coaching PPT:
- Lead side view: check pelvic timing and spinal length
- Rear view: confirm glute activation
- Front view: monitor rib control and core engagement
- Cue PPT during transition and impact for maximum effect
- Release tilt after impact to restore flow and rhythm
- Use breath strategically: inhale into the ribs, exhale through the floor
Timing is everything. When PPT fires at the right moment, the spine stays supported, rotation flows, and power is delivered cleanly.
Step 3: Apply in Real Swings
Bring PPT into practice with short, clear cues. Avoid complex explanations mid swing. Instead, use simple commands like “Brace and tilt” or “Stack ribs over hips”. These connect thought to action instantly and keep the swing natural.
Step 4: Reinforce with Breath
Breath is the hidden partner of PPT. Inhale to expand the ribs, exhale to anchor through the floor. This rhythm prevents over bracing and keeps the swing fluid and repeatable.
Step 5: Build Confidence
Practice PPT in drills, mirror work, and slow swings until it feels automatic. Once mastered, PPT becomes instinctive. It protects the spine and unlocks effortless rotation. Cueing makes it repeatable, and repetition makes it yours.
2.2 Anterior Pelvic Tilt: The Silent Saboteur
Anterior pelvic tilt is one of the most common postural issues in golf. It looks like strength at setup, but in reality it undermines rotation, sequencing, and spinal health. This section explains how to recognize it, what it looks like in the body, and how to coach against its risks.

The image shows exactly what you need to spot: the pelvis tipping forward, the beltline angled down, and the lower back curving. This posture looks strong but is deceptive. When dominant, anterior tilt shifts force into the lumbar spine, disengages the glutes, and blocks clean hip rotation. It is not just inefficient, it is risky. Unless a player is posterior tilt dominant and needs access to the posterior chain, anterior tilt should not be encouraged. Misuse leads to instability, lumbar strain, and performance breakdown.
What You Should See
APT posture is easy to recognize once you know the markers. From the side, the pelvis tips forward, the tailbone lifts, and the beltline angles downward. From behind, the glutes look active but fail to engage. From the front, ribs flare and the abs relax, while the chest looks puffed unnaturally. From above, weight shifts into the toes and the hips trail behind the torso. During follow through, the spine overextends, the lumbar curve deepens, and the glutes shut off.
What You Should Do
Coaches and players can manage APT by observing from multiple angles. Watch from the lead side to assess pelvic angle and lumbar curve. Use rear view to confirm glute inactivity and hip lock during rotation. From the front, spot rib flare and abdominal disengagement. Teach players to hinge from the hips while keeping the abs engaged. Prescribe glute activation drills to counteract dominant hip flexors. Breathing helps reduce lumbar tension and restore core control. Train APT only in players who are posterior tilt dominant and need posterior chain access, and release the tilt during rotation and impact to avoid spinal overload.
Core vs Back Dominance
APT itself is not the enemy. The danger lies in whether it is core dominant or back dominant. Core dominant APT uses abdominal engagement and glute activation to balance the tilt, creating space for rotation and power. Back dominant APT ignores the core, relying on spinal erectors and hip flexors, which overloads the lumbar spine and blocks clean sequencing. Train your eyes to see the difference. A tilt led by the core can be a tool. A tilt led by the back becomes a saboteur.
Expect pain, instability, and loss of swing integrity if APT dominates without support. Train it with intention. Time it with precision. Release it when the swing demands freedom.
Anterior Pelvic Tilt: Unlocking Rotation and Power

The image shows how anterior pelvic tilt looks in posture: the pelvis tipping forward, the belt buckle pointing down, and the tailbone rising slightly behind. This visual helps you connect the description to what you should see in real players.
Anterior pelvic tilt is a posture that can either fuel your swing or break it down. This section explains how it looks, what it does to your body, and how to train it correctly so it supports rotation and power instead of causing instability.
Anterior pelvic tilt (APT) means your hips tip forward slightly: the front drops, the back lifts, and your lower back arches. When used with control, this shape helps you stay tall, rotate better, and finish strong. APT is not just a posture, it is a pattern. When trained well, it preloads power and supports clean rotation. When left unchecked, it can cause early extension and break your swing.
How APT Looks in Posture
When someone stands in anterior pelvic tilt, the hips tip forward and the pelvis rotates down at the front. The belt buckle points toward the ground, while the tailbone rises slightly behind. This creates a gentle curve in the lower back, so the lumbar spine looks arched and the ribs flare forward.
From the side view, the posture feels tall but exaggerated. The chest is lifted, the stomach may look stretched outward, and the glutes appear active but do not fully engage. Weight often shifts toward the toes, which makes the hips lose depth and the stance feel less grounded. The abs are soft, the spine looks overextended, and the body carries tension in the lower back rather than balance through the core.
In motion, this posture produces a wide backswing with plenty of turn, but it also sets up the risk of thrusting the hips toward the ball on the downswing. The spine lifts, posture breaks, and rotation stalls. What looks powerful at first glance can quickly become unstable if the tilt is not supported by strong abdominal and glute activation.
APT can look strong, but without control it sabotages motion. The key is training it with muscle support and timing. Think of the pelvis as a bowl tipping forward: the belt buckle points toward the ground while the tailbone rises. This creates a curve in the lower back and shifts the hips behind the body. Done correctly, it loads the posterior chain: glutes, hamstrings, and spine for power. But if the abs are soft and the glutes dormant, the tilt becomes dysfunctional.
Muscle behavior in APT shows a clear imbalance. Hip flexors, spinal erectors, and lats dominate, while glutes, hamstrings, and abdominals often underperform. APT works best when the abs engage and the glutes activate to balance the tilt.
Which Tilt Are We Talking About?
It is important to clarify. Posterior pelvic tilt activates the deep core and braces the spine. Anterior pelvic tilt, by contrast, lengthens the front of the body and often ignores the deep core unless it is trained with abdominal and glute support. Lateral tilt adds another dimension. It can be core dominant, keeping rotation stable, or back dominant, leading to collapse and strain. Your eyes must learn to read which tilt is present, and which muscles are in command. APT without core support is posture without power. APT with core support is posture that fuels rotation.
Why APT Works in Golf
Anterior tilt has clear benefits when trained with control. It preloads the back side of the body for power, helps maintain spine angle through the swing, supports the hip hinge at setup, promotes rotational torque, and improves sequencing for a more consistent club path.
Why APT Causes Early Extension
When pelvic control is poor, APT causes early extension. Tight hip flexors and weak glutes block rotation, limited upper spine mobility forces compensation, and overuse of lumbar extension breaks posture. Weight shifts into the toes, the body thrusts forward to regain balance, and fear of ground contact creates a subconscious flinch. These breakdowns show why APT must be trained as a setup tool, not a default swing pattern.
With control, APT builds space, supports rotation, and finishes tall. Without it, posture breaks and power leaks away.
Anterior Tilt in the Swing
Your swing begins with how you stand, and anterior tilt sets the tone. When you open the front of your hips and let your spine feel long, the body rises into a tall, ready posture. It is not just a position, it is a feeling of space, of being lifted and prepared to move. The chest stays proud, the lower back arches gently, and the body feels like it has room to breathe. That is the setup, and it is the foundation for everything that follows.
Cue: “Open the front of your hips. Stand tall and strong.”
As the swing transitions, anterior tilt keeps the body long while rotation unfolds. The stretch across the front of the hips holds, the spine stays extended, and the core tightens inward to guide the turn. This is not about forcing the motion, it is about staying tall and letting the rotation flow naturally from the middle. The tilt creates a channel where power can load without collapsing posture.
Cue: “Stay long through the turn. Tighten your core inward.”
When it is time to release, anterior tilt drives the finish upward. The legs push through the ground, the chest opens, and the spine extends with force. The finish feels proud, balanced, and complete. It is the moment where posture and power meet, where the tall setup pays off in a clean strike and a strong finish.
Cue: “Drive up through the chest. Tighten your core inward and finish tall.”
Quick Recap
Coaching Anterior Tilt
Anterior tilt is more than a posture cue, it is a teaching tool. Mirrors help players see the difference between passive tilt and active engagement. Coaches guide them to hinge from the hips rather than simply arching the back. Abdominal engagement supports the tilt, while glute activation balances the pull of the hip flexors. Breathing reduces tension, allowing the spine to stay long without strain.
APT works best as a setup tool, not a default swing phase. When trained with control, it builds space, supports rotation, and finishes tall. But timing is everything. If anterior tilt is not supported or arrives at the wrong moment, posture breaks down and power leaks away. When it is trained correctly, though, it becomes a powerful ally in creating a swing that feels both strong and effortless.
Chapter 3: How to Use the Eyes When Analyzing a Golf Swing
Analyzing a swing is not about chasing every detail. It is about knowing where to look and when. This chapter shows you how to train your eyes to see the core first, so the rest of the motion makes sense.
Most players struggle to analyze a swing because they look everywhere and see nothing. They chase clubface patterns, grip tweaks, or arm paths without understanding what drives them. They see symptoms, not sources.
The real skill is learning where to look and when.
Start With the Core. Stay With the Core.
When you analyze a swing, lock your eyes on the core. From setup to follow through, track how the pelvis tilts, how the belly compresses, how the ribs stack. Watch how the brace holds or breaks. This is your foundation.
🔗 Research confirms pelvic tilt is critical for balance, rotation, and injury risk. TPI: Pelvic Tilt in the Golf Swing
Think of your eyes as the director of the swing’s story. Instead of chasing every detail, let them guide you to the heart of the motion. When you stay with the core, the rest of the swing begins to make sense. The arms, the clubface, even the finish are simply chapters that follow the command of the core. Once you learn to see this sequence, analysis becomes less about guessing and more about understanding the rhythm that drives every shot.
Which Tilt Are We Looking At?
It is important to be precise. Posterior pelvic tilt is the ignition that activates the deep core. When you see it in the swing, you are watching the body brace, stabilize, and prepare to transfer force. Anterior pelvic tilt, by contrast, opens the hips and lengthens the spine but often ignores the deep core. It can look tall and proud, yet if it is not supported, it leaves the spine vulnerable and the swing hollow. Lateral tilt adds another layer. It can be driven by the core, keeping rotation stable, or it can be hijacked by the back, leading to collapse and strain. Your eyes must learn to distinguish these stories. Are you seeing tilt with core dominance, or tilt with back dominance? The difference is subtle, but it decides whether the swing is powerful or fragile.
When you analyze, do not just note that tilt exists. Ask yourself: which tilt is this, and which muscles are in command? Posterior tilt signals ignition. Anterior tilt signals posture. Lateral tilt signals balance. Only when tilt is paired with core dominance does the swing become resilient. This is the narrative your eyes must learn to read.
Why this works
Analysis becomes powerful when your eyes focus on the source of motion. This section explains why looking at the core first makes every symptom easier to read and every fix more direct.
When you train your eyes to focus on the source of motion, the guessing game ends. Clubface reactions and grip compensations stop being distractions, they become signals pointing you back to the origin. You begin to see what truly drives the swing: the pelvis sequencing with the trunk, the core bracing, the rotation stacking from the ground up. Once the source is clear, the fix is simple. You stop chasing symptoms, you solve the root.
🔗 Rotational sequencing of the pelvis and trunk drives speed and consistency: International Journal of Golf Science: Rotational Kinematics
In surgery, the best doctors do not scan the whole body at once. They zoom in, follow the pulse of a single artery, watch how tissue responds to pressure, and read the body layer by layer. Their eyes are trained to find the source, not the noise. That is how they solve the root problem. You apply the same discipline to the golf swing. You track tilt, brace, and rotation at the core first. When the source is clean, the symptoms vanish, and the motion finally makes sense.
Picture yourself standing behind a player on the range. The ball flies left, then right, then high, then low. Most eyes chase the clubface, searching for answers in the hands. But your eyes stay anchored to the pelvis. You see the tilt arrive too early, the brace fade too soon, the rotation stall. In that moment, the mystery dissolves. You are not guessing anymore, you are reading the swing like a map. The story is clear: the source commands the motion, the symptoms simply follow. This is the art of analysis, and it is never boring when you know where to look.
Sequential eye training

The image illustrates how focus shifts step by step: pelvis, ribs, shoulders, and arms. Training the eyes in sequence builds clarity and control. Each focus writes a layer of memory into the body, and those layers stack into a motion that feels reliable and repeatable.
The science of motor learning shows that the eyes work best when they focus in sequence, one body part at a time. You learn the pelvis first, then the ribs, then the shoulders, then the arms. Research confirms that teaching movement one segment at a time raises quality and control, much like reading a sentence word by word until the meaning lands (Yamada & Raisbeck, Journal of Sport Rehabilitation).
Narrowing attention sharpens learning and makes it stick. When a golfer locks eyes on the pelvis or ribs during practice, the body writes a stronger memory and the skill returns under pressure (Song, The Role of Attention in Motor Control and Learning).
Across sports, breaking complexity into parts improves coordination and lowers strain. It is like learning music: left hand first, right hand next, then both hands together. In golf, isolating the pelvis before adding shoulders and arms turns chaos into rhythm (Nijmeijer et al., Motor Learning & Biomechanics).
Stepwise shifts in focus build a steadier pattern and a memory that lasts. Moving your eyes in order — pelvis, ribs, shoulders, arms — makes the swing feel grounded today and remembered tomorrow (Shan, Biomechanics and Motor Learning).

Chapter 4: How to Command Accurately With Ease in Golf
Talk less and achieve better results. This cue system stuns and sequences with ease. Golf does not wait for analysis, it waits for ignition. You have 900 to 1500 milliseconds to swing, and in that window your body does not want a lecture, it wants a command. Every cue here is built for instinct, not discussion. When you shadow your pre‑shot, do not just rehearse positions: speak to your core. When nerves rise, trust your core. When you feel disconnected, trust your core in. When stability, speed, distance, direction, or altitude fade, trust your core.
Research shows motor timing is critical for coordinated golf swings and attentional focus accelerates learning. Studies highlight that the brain thrives on precise timing. When attention narrows, learning speeds up. For golfers, sharper focus on the core translates into faster mastery of the swing (Song, Current Opinion in Psychology).
The moment you initiate movement, your brain has less than 300 milliseconds to send the signal. That is faster than thought, pure ignition. The analytical process must already be synced with the body. You do not think your way through the swing, you detonate it. When ready, the core command is waiting. You summon it, own it, swing with it, right now.
Reviews confirm concise verbal cues improve movement quality and performance. Short, precise cues sharpen execution. In golf, phrases like “brace the belly” or “stack the ribs” act as instant switches, guiding the body without cluttering the mind (Yamada & Raisbeck, Journal of Sport Rehabilitation).
In this chapter, you are not just meeting golf cues, you are meeting movement cues battle‑tested across disciplines. Physiotherapists use them to protect the spine, strength coaches to activate the core, elite trainers to sequence power under pressure. Tilt Golf calibrates these universal biomechanical triggers for the swing. Every cue has a purpose, every phrase is felt. Applied correctly, you are executing a cross‑disciplinary ignition protocol built to survive torque, fatigue, and speed.
Reviews confirm athletes learn complex skills by isolating and mastering one body part before integrating others. Breaking skills into parts builds stronger foundations. In golf, isolating the pelvis before layering shoulders and arms makes the swing more stable and less chaotic (Nijmeijer et al., Motor Learning & Biomechanics).
Evidence shows progressive attention shifts improve stability and long‑term retention. Stepwise shifts in focus create lasting memory. Moving eyes from pelvis to ribs to shoulders in sequence builds a swing that feels grounded today and remembered tomorrow (Shan, MDPI Applied Sciences).
Every cue has a purpose, every phrase is felt. Cueing language supports this skill: short, targeted triggers like “brace the belly,” “anchor the tilt,” or “stack the ribs.” These cues become fast‑access switches that reinforce movement patterns without overthinking.
Reviews confirm the modern golf swing places significant stress on the lumbar spine and low back pain is common among golfers. These findings remind us that cues are not just about performance, they are about protection. A well‑timed brace or tilt saves the spine from overload and keeps the golfer healthy through repetition (Sports Medicine; The Spine Journal).
A. Cue Table: Core and Pelvic Control
B. Cue Table: Core and Pelvic Control
| Cue | Why It Works | When |
|---|---|---|
| On that takeaway, let that outer elbow talk to your core — core inward. | Trail arm cue. Connects elbow to brace. | Takeaway |
| On your transition, give your best core strength inward. | Peak brace cue. Prevents early extension. | Transition |
| As you go down, prepare for impact with more core inward. | Pre-impact brace. Prevents collapse. | Downswing |
| Use that bent elbow to talk to your core. | Trail arm cue. Reinforces sequencing. | Transition, downswing |
| As it goes down, shorten that strong core inward. | Final brace cue. Locks spine. | Downswing |
| Let go of your lower back — don’t tighten it. | Prevents lumbar compensation. | Setup, transition |
| Stop thinking about your lower back and think about your core. | Redirects attention. Prevents overcorrection. | Setup, recovery |
C. Cue Table: Bonus Cues (Part 1)
| Cue Phrase | When to Use | What the Body Should Feel |
|---|---|---|
| Do your deepest core in and no release and putt easy with your loose arms. | Putting | Belly firm, arms soft |
| Let go of your hand and let the core do the job. | Transition, impact | Turn from your center, not your hands |
| Don’t push your core out or you will slice. | Setup, downswing | Keep your belly in — no bulging |
| Fight it inwards. | Transition, downswing | Stay tight even under pressure |
C. Cue Table: Bonus Cues (Part 2)
| Cue Phrase | When to Use | What the Body Should Feel |
|---|---|---|
| Let go of your lower back. Don’t tighten it. | Setup, transition | Relax your back, focus on your belly |
| Stop thinking about your lower back and think about your core. | Setup, recovery | Shift attention to your center |
| When you are hurting on your back, you know what to do. Core in. | Post-round, fatigue | Tighten belly to protect your spine |
D. Cue Table: Core and Pelvic Control
This table is a biomechanical ignition map. Each cue is a physical switch you can feel immediately. When you say core in, your spine decompresses, your pelvis locks, your wrists stop compensating, and your swing begins to sequence. When you fight inward, you stop grinding bone against bone, you stop leaking power, and you stop hurting.
These cues are accurate because they are anatomical, useful because they are repeatable, and precise because they were built for milliseconds, not minutes. You do not need to understand every muscle: you need to command one thing. Core in. The rest will follow.
The brain connects to the body through clarity, the body connects to the arms through timing, and the arms connect to the ball through trust. When the instruction is clear, ignition is automatic. This is how you swing, this is how you protect, this is how you perform.
Chapter 5: Why the swing falls apart when the core is not in

The image highlights how instability in the core disrupts the chain of motion. Just as loose bolts weaken an engine, poor bracing shifts stress into smaller joints, causing breakdowns in posture, rotation, and power.
What is really breaking down in a golfer’s swing mechanics? Many golfers blame their hands, hips, or shoulders. In Core Ignition Golf, the real issue starts deeper: it starts with the core. The core is the ignition chamber. Without it, the rest of the swing is guessing, improvising, and compensating.
Think of the swing as a chain. The core is the first link. If that link is weak, every other link bends under pressure. Posture collapses, rotation stalls, and joints begin to ache. Balance wobbles at setup, power fades through transition, and feel vanishes at impact. No swing tip can repair this until the core does its job.
Guidance confirms weak core muscles lead to swing breakdowns and pain, especially in the shoulders and lower back (Hope Physical Therapy).
When the brace is missing, the body shifts stress into smaller joints. Shoulders grind, lower backs flare, wrists overcompensate. The swing becomes a patchwork of fixes instead of a unified motion.
Reviews show poor core control forces other body parts to compensate, hurting swing speed and consistency (Momentum Health).
Speed is not born in the arms. It is transferred through a stable trunk. When the core locks, energy flows cleanly from the ground into the club. When it fails, the chain leaks power and rhythm.
A 2022 review found that when core stability is off, swing mechanics fall apart and injury risk rises (MDPI Sports).
Stable patterns are like scaffolding. They hold the body upright under speed and fatigue. Without them, the swing crumbles under pressure, leaving the golfer exposed to breakdown and injury.
Studies link lower back pain in golfers directly to poor core sequencing and pelvic control (Journal of Sports Sciences).
Pelvic control is the steering wheel of rotation. When sequencing fails, torque shifts into the lumbar spine. Pain is not random: it is the body’s alarm that the engine is misfiring.
Imagine driving a car with loose bolts in the engine. The ride feels shaky, the speed drops, and parts begin to wear out. That is what happens when the core is not in. The swing rattles, leaks, and eventually breaks. The fix is simple: tighten the bolts, brace the core, and the whole machine runs smooth.
When the core stabilizes the spine and pelvis, the rest of the body stops guessing. Shoulders rotate freely, hips sequence naturally, wrists release without strain. The swing feels unified. The lesson is clear: core first, everything else follows. Principle to evidence to imagery to lesson: brace, stack, rotate, release.
What you will learn

The image illustrates the difference between a swing with the core braced versus silent. It visually reinforces the lesson: core in equals posture steady, joints aligned, swing alive.
- How to keep your core in so your swing stays strong
- Why posture breaks when the core goes quiet
- How each joint reacts when the core is not doing its job
- How to group swing patterns into two types: core in vs. core out
- How to fix common problems using simple core‑first moves
Each of these lessons is more than a checklist. They are ignition points. When you learn to keep the core in, the swing feels like a machine running smooth. When posture breaks, you will see how the body scrambles to compensate. When joints react, you will feel the strain shift into places it does not belong. Grouping swings into core in versus core out will show you the difference between a motion that flows and one that fights itself. Fixing problems with core‑first moves will teach you that the solution is not complicated: it is immediate, physical, and repeatable.
Imagine standing at address with the core silent. The shoulders tighten, the hips stall, the wrists flick to save the shot. Now imagine the same stance with the core braced. The spine stacks, the pelvis anchors, the arms swing free. That is the contrast you will learn to see and feel. Principle to evidence to imagery to lesson: core in, posture steady, joints aligned, swing alive.
What Happens When The Core is not Activated
This breakdown shows how each joint in the body responds when the core is not doing its job. Every joint has a role: either mobility or stability. When the core goes quiet, those roles get confused. The table reveals the most common breakdowns and gives you a core‑first fix for each one. It is a diagnostic map for your swing, from head to foot.
Each row in this table is more than a symptom list. It is a story of how the body reacts when the engine shuts down. The head lifts because balance is lost. The neck tightens because rotation has no anchor. The upper spine locks because the ribs are not braced. The lower back strains because the pelvis is drifting. The shoulder blades pop because the ribs collapse. The shoulders overwork because the foundation is gone. Every breakdown is a chain reaction that starts with the core.
Now imagine the opposite. The core is braced, the spine stacked, the pelvis anchored. The head stays quiet, the neck follows smoothly, the upper back rotates freely, the lower back holds posture, the blades stay flush, and the shoulders glide around a stable base. This is not theory. It is the difference you can feel when the ignition is on. Core in, joints aligned, swing alive.
Chapter 6: The Core Ignition Across All The Phases
Setup to Backswing
Core dominance: In this phase, the abdominals must lead the motion. The spine, hips, and shoulders only move cleanly when the core is braced first. To engage it, tuck the pelvis slightly backward into posterior tilt, draw the stomach inward, and stack the ribs over the hips. This locks the spine, stabilizes the pelvis, and creates the foundation for rotation. Without this engagement, the hips drift, the spine arches, and the arms are forced to compensate. With it, the swing begins balanced, powerful, and protected.


At setup: tuck your pelvis slightly backward to activate posterior tilt. Brace your abdominals inward so the spine flattens and the ribs stack over the hips. This is the ignition point: your core is now switched on.
During the backswing: keep the brace constant. Do not let the pelvis drift forward into anterior tilt. Keep your ribs tucked and your stomach firm. This prevents collapse and keeps rotation clean.
Avoid traps: over‑recruiting the hip flexors will pull your pelvis forward. Reset by tightening your abs inward and flattening your low back. This stops the arms from compensating and keeps power in the core.
Use breath: inhale into the ribs to expand laterally, then exhale while keeping the pelvis tucked. This stabilizes the spine and maintains abdominal engagement through the backswing.
Check your feel: posterior tilt should feel connected, strong, and balanced. Anterior tilt will feel strained, disconnected, and reactive. Train until you can recognize the difference instantly.


Chapter 7: Tilt timing across the golf swing phases
The image illustrates tilt timing across swing phases. It shows how posterior tilt anchors the spine, keeps posture stable, and allows hips, ribs, and shoulders to move in rhythm. This visual reinforces the doctrine: tilt timed correctly transforms mechanics into natural rhythm.
Tilt timing is the rhythm that unlocks the swing. At address, when tilt engages with the core, the body feels balanced and ready. As the motion unfolds, tilt keeps the chain of hips, ribs, and shoulders moving in harmony. The strike becomes crisp, the posture stays strong, and the ball flight is consistent. Tilt is not a burden to learn, it is the key that makes the swing feel natural.
Dr. Greg Rose captured this with motion data, showing that elite players hold posterior tilt through impact with deep core muscles. This is why their swings look effortless and their spines remain protected.
Research confirms pelvic tilt is a critical movement pattern influencing balance, rotation, and injury risk (TPI).
His work proves tilt is the anchor that stabilizes power under speed.
Janis Thornton revealed that tilt flows reflexively when the TVA, obliques, and glutes contract in rhythm. It is like a backswing that loads smoothly: the body organizes the motion without strain.
Guidance shows tilt timing requires reflexive co‑contraction of deep core muscles (JT Fitness & Golf).
Her insight shows tilt becomes instinctive with practice, just like knowing the clubface without looking.
Jim Nugent demonstrated that tilt protects the spine and supports longevity in the game. Golfers who keep tilt engaged move with confidence and avoid unnecessary strain.
Clinical insight confirms tilt reduces lumbar strain and sacroiliac dysfunction (River Forest Health).
His findings highlight that tilt is not just about performance, it is about building a swing that lasts for years.
The doctrine makes it clear: cueing tilt at the right moments transforms mechanics into rhythm. When tilt is timed, the ball flies true. When tilt is braced, the body holds posture. When tilt is led by the core, the swing feels effortless. This is the reason Tilt Golf builds swings that endure: because Tilt Golf cueing is applied with precision, clarity, and rhythm. Cueing is not complexity, it is the language of the doctrine, and when golfers embrace it, their swing becomes instinctive, repeatable, and lasting.
7.1 Why Core Is Everything
The core is the command center of the swing. The TVA braces with precision, the obliques spiral rotation with power, and the glutes anchor the pelvis with stability. Together they create a strong axis that lets the swing unfold with balance, speed, and confidence.
- Core activation strengthens tilt
- Rotation flows efficiently
- The spine stays supported
- The clubface squares naturally
- The swing channels maximum power
With the core engaged, every part of the swing feels connected. Tilt holds steady, rotation flows smoothly, posture stays tall, and the strike feels effortless.
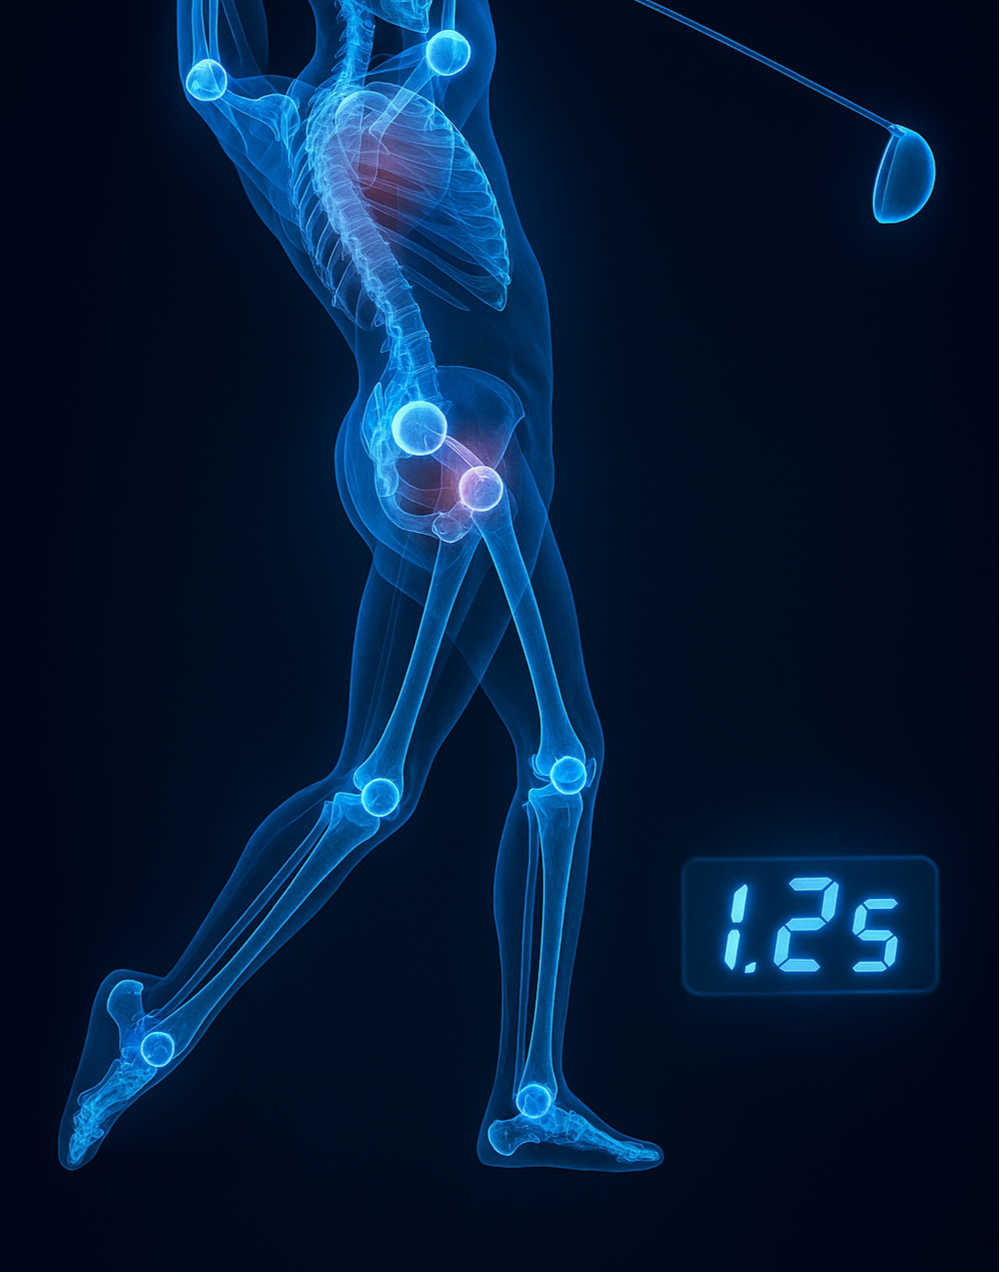
Timing Is Everything
From setup to finish, the swing unfolds in under 1.5 seconds. That speed is neuromotor lightning, and within that window the body organizes itself when the right cues are applied:
- Brace with the TVA
- Spiral with the obliques
- Anchor with the glutes
- Hold tilt with confidence
- Rotate the spine smoothly
- Sequence the joints in rhythm
- Deliver the club with precision
- Finish tall and balanced
Cueing and Execution
Golf is anatomical, but golfers thrive on feel. Cueing bridges the gap. Instead of complex terminology, you cue brace, spiral, tilt, and the body responds instantly. Cueing turns science into instinct, clarity into confidence.
Simple cues let the golfer act quickly and execute the exact part you want to train. Years of anatomy study are translated into a language golfers can use. Cueing is what makes doctrine practical: it is the spark that transforms mechanics into rhythm.
Thought Processing and Final Doctrine
Imagine stepping into setup, cueing your TVA, feeling your glutes anchor the pelvis, spiraling the brace, holding tilt, rotating, releasing, and finishing tall. All of this happens in 900 to 1500 milliseconds. That is the speed of the game, and cueing is what makes it possible.
With cueing, the swing feels connected, powerful, and safe. You are not just swinging better, you are swinging smarter, faster, and with more confidence. Cueing links thought to execution, firing the system in under 1.5 seconds. That is why this chapter matters, why the research matters, and why the doctrine exists. Tilt Golf builds swings that endure because Tilt Golf cueing is applied with precision, clarity, and rhythm. Cueing is the language of the doctrine, and when golfers embrace it, their swing becomes instinctive, repeatable, and lasting.
7.2 How To Catch Up With Commands in The Golf Phases
This table is a guide to align the timing of the golf swing with the instructions you give. Each phase of the swing lasts only a few tenths of a second, so cues must be delivered clearly and efficiently to match the rhythm of the motion.
The table highlights:
- When each phase occurs, from setup to follow-through
- Which cue to give the golfer during that phase
- What the golfer should feel in their body to execute the cue with confidence
By organizing instructions around the actual timing of the swing, coaching becomes accurate and actionable. Golfers thrive on short, direct cues that match the moment, allowing them to move with clarity and rhythm.
This approach empowers you to:
- Deliver the right cue at the right time
- Use language that is simple, clear, and effective
- Reinforce strong movement patterns with precision
The bonus section extends these cues to putting, recovery, and training, showing that the same principles apply across every aspect of the game.
This format elevates how you communicate, teach, and reinforce core and pelvic control throughout the swing sequence. It turns instruction into instinct, and rhythm into repeatable performance.
The doctrine makes it clear: cueing is the key to catching up with the speed of the swing. When cues are applied with precision, the golfer feels connected, confident, and powerful. Tilt Golf builds swings that endure because cueing is woven into every phase, guiding the body to move in harmony with the club. This is not complexity, it is clarity, and it is the language that makes the doctrine live on the course.
This table is not here to make you chase milliseconds. It is here to show how the swing can be broken into phases, each with a simple cue and a physical feel. The numbers remind you how fast the swing unfolds, but the real lesson is that you learn it piece by piece. Setup, takeaway, top, transition, impact, follow through: each phase is a partition you can practice until the whole pattern flows.
The cues are ignition switches. They activate the right muscles at the right time, protect your spine, stabilize your hips, and synchronize your rhythm. You do not need to memorize mechanics: you need to feel ignition. This table delivers clarity and rhythm, turning complexity into simple triggers you can trust. Simple cues are powerful because they are authoritative and instantly executable. When a golfer hears them, they know exactly what to do and respond instinctively. That is why this table matters: it transforms instruction into action and makes the swing feel natural and repeatable.
7.3 Why timing is shown but not chased
Golf swings happen in fractions of a second. From setup to follow through, the motion is over before the mind can consciously track it. That is why it is impossible to keep up with the exact timing of each phase. You cannot count milliseconds while swinging. The body moves too fast, and the swing must be felt, not measured.
The reason the phase cue chart is shown is not to make you chase the clock. It exists to illustrate how the swing can be taught in partitions. Each phase: setup, takeaway, top, transition, impact, follow through, is a segment of the whole. By isolating these segments, you practice fundamentals one piece at a time. When each piece is mastered, the complete pattern emerges naturally.
This approach shortens learning time. Instead of drowning in mechanics, you anchor to one cue per phase. Core in at setup, ribs tucked at the top, hips under at impact. These cues are ignition switches. They simplify instruction, protect the body, and build rhythm. You do not need to memorize every detail: you need to feel ignition.
Think of it like music. A song is not learned by playing it all at once. You practice bars, then phrases, then sections. The cues are notes, the phases are measures. When combined, the rhythm flows without you counting every beat. The swing works the same way: partitioned practice builds instinctive motion.
So the chart is not a stopwatch. It is a map. It shows the sequence of ignition, the order of cues, and the feel of each phase. Use it to break the swing down, apply fundamentals, and let tilt patterns guide you. When you train this way, the swing becomes less about memorizing mechanics and more about trusting rhythm and ignition.